
Cottage Cheese Pancakes: A Delicious Twist on a Classic Breakfast
Cottage Cheese Pancakes are not just your average breakfast; they are a delightful fusion of flavor and nutrition that will elevate your morning routine. Imagine fluffy pancakes that are not only light and airy but also packed with protein, making them a perfect choice for a wholesome start to your day. This recipe has roots in various cultures, where cottage cheese has long been celebrated for its versatility and health benefits.
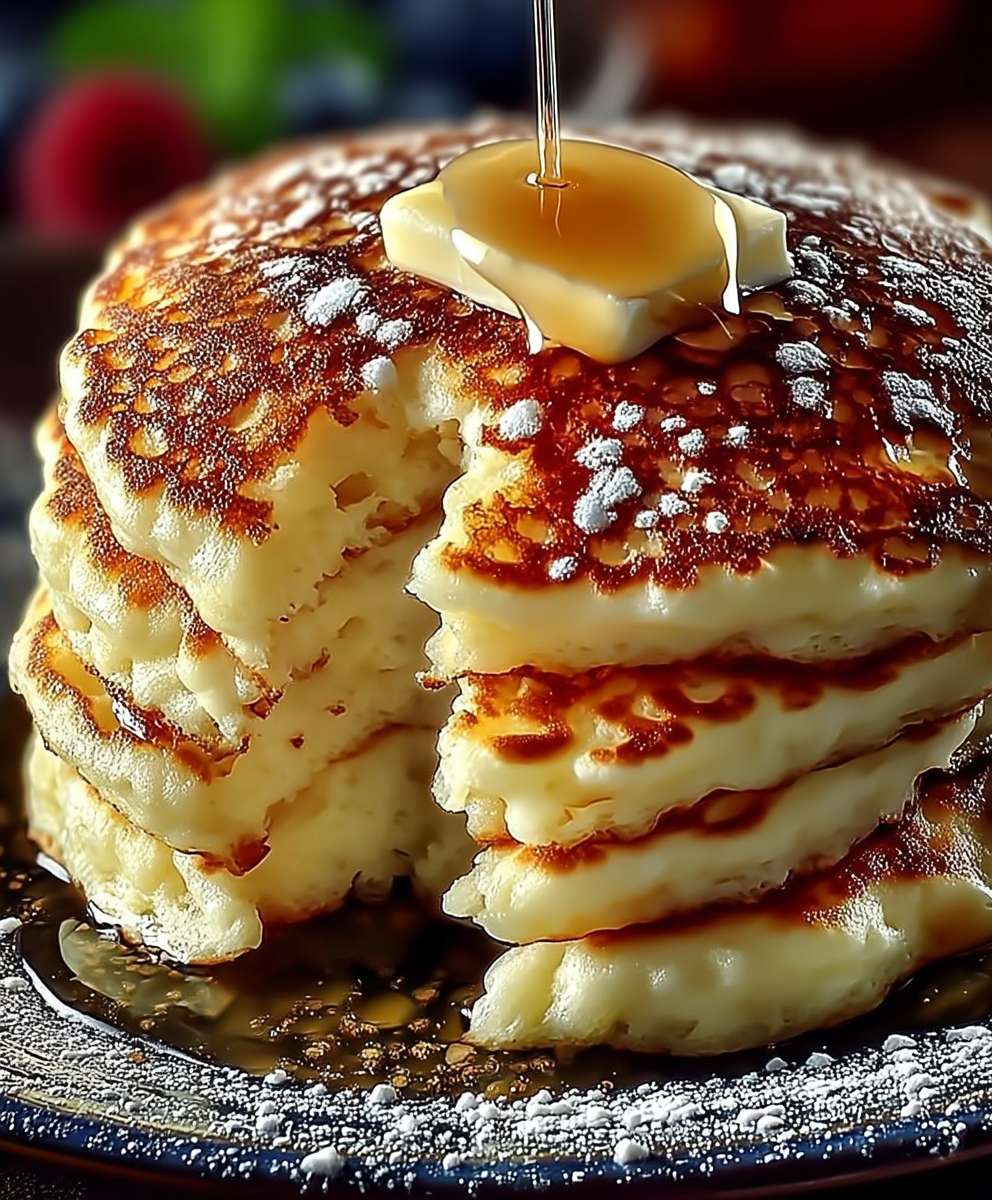
People love Cottage Cheese Pancakes for their unique texture and rich taste. The addition of cottage cheese creates a moist pancake that is both satisfying and guilt-free. Whether you enjoy them drizzled with maple syrup, topped with fresh fruits, or even slathered with yogurt, these pancakes are incredibly convenient to whip up on a busy morning. Trust me, once you try this recipe, you’ll understand why Cottage Cheese Pancakes have become a beloved breakfast staple in many households!

Ingredients:
- 1 cup cottage cheese
- 3 large eggs
- 1 cup all-purpose flour
- 1 tablespoon sugar (optional)
- 1 teaspoon baking powder
- 1/2 teaspoon baking soda
- 1/4 teaspoon salt
- 1/2 teaspoon vanilla extract
- 2 tablespoons melted butter or oil (plus more for cooking)
- Maple syrup or fruit for serving (optional)
Preparing the Batter
- In a large mixing bowl, combine the cottage cheese and eggs. Use a whisk or fork to mix them together until well blended. The cottage cheese should be mostly smooth, but a few lumps are okay for texture.
- Add the melted butter (or oil) and vanilla extract to the mixture. Stir until everything is combined.
- In a separate bowl, whisk together the flour, sugar (if using), baking powder, baking soda, and salt. This helps to evenly distribute the leavening agents and ensures a fluffy pancake.
- Gradually add the dry ingredients to the wet ingredients. Stir gently until just combined. Be careful not to overmix; a few lumps are perfectly fine. The batter should be thick but pourable.
Cooking Process
- Heat a non-stick skillet or griddle over medium heat. Add a small amount of butter or oil to coat the surface.
- Once the skillet is hot, pour about 1/4 cup of batter onto the skillet for each pancake. You can adjust the size based on your preference.
- Cook the pancakes for about 3-4 minutes, or until you see bubbles forming on the surface and the edges look set. This indicates that it’s time to flip them.
- Carefully flip the pancakes using a spatula and cook for an additional 2-3 minutes on the other side, until golden brown and cooked through.
- Transfer the cooked pancakes to a plate and keep them warm in a low oven (around 200°F or 93°C) while you cook the remaining batter.
Assembling and Serving
- Once all the pancakes are cooked, stack them on a serving plate. You can layer them with a pat of butter in between each pancake for extra flavor.
- Serve the pancakes warm with your choice of toppings. I love drizzling them with maple syrup, but fresh fruit, yogurt, or a sprinkle of powdered sugar also make delightful additions.
- If you want to get creative, consider adding toppings like sliced bananas, berries, or even a dollop of whipped cream for a special treat.
Storage and Reheating
- If you have leftovers, let the pancakes cool completely before storing them in an airtight container in the refrigerator. They can be kept for up to 3 days.
- To reheat, simply place them in a toaster or microwave until warmed through. You can also reheat them in a skillet over low heat for a few minutes on each side.
- For longer storage, you can freeze the pancakes. Place parchment paper between each pancake to prevent sticking, then store them in a freezer-safe bag or container. They can be frozen for up to 2 months.
Tips for Perfect Pancakes
- For extra fluffiness, let the batter rest for about 10 minutes before cooking. This allows the flour to hydrate and the leavening agents to activate.
- Make sure your skillet is at the right temperature. If it’s too hot, the pancakes will burn on the outside while remaining raw on the inside. If it’s too cool, they won’t brown properly.
- Experiment with add-ins! You can mix in chocolate chips, nuts, or spices like cinnamon to customize your pancakes.
- For a healthier version, you can substitute half of the all-purpose flour with whole wheat flour or oat flour.
Variations
- Blueberry Cottage Cheese Pancakes: Fold in 1/2 cup of fresh or frozen blueberries into the
Conclusion:
If you’re looking for a delicious and nutritious breakfast option, these Cottage Cheese Pancakes are an absolute must-try! Not only are they fluffy and satisfying, but they also pack a protein punch thanks to the cottage cheese, making them a perfect choice for anyone wanting to start their day on a healthy note. The combination of creamy cottage cheese and light, airy pancakes creates a delightful texture that is sure to please both kids and adults alike.
One of the best things about these pancakes is their versatility. You can easily customize them to suit your taste preferences or dietary needs. For a sweeter twist, consider adding a splash of vanilla extract or a sprinkle of cinnamon to the batter. If you’re feeling adventurous, try folding in some fresh blueberries or chocolate chips for an extra burst of flavor. You can also swap out the all-purpose flour for whole wheat flour or a gluten-free alternative to cater to different dietary restrictions.
When it comes to serving suggestions, the possibilities are endless! I love topping my Cottage Cheese Pancakes with a dollop of Greek yogurt and a drizzle of honey for a delightful breakfast treat. Fresh fruit, such as sliced bananas or strawberries, adds a refreshing touch and a pop of color to your plate. For those who enjoy a savory breakfast, consider serving these pancakes with a side of crispy bacon or smoked salmon, along with a sprinkle of chives or dill for an elegant brunch option.
I encourage you to give this recipe a try and experience the deliciousness for yourself. Whether you’re cooking for yourself, your family, or hosting a brunch gathering, these pancakes are sure to impress. Don’t forget to share your experience with me! I would love to hear how your Cottage Cheese Pancakes turned out and any unique variations you tried. Your feedback not only inspires me but also helps others discover new ways to enjoy this delightful dish. So grab your mixing bowl and whisk, and let’s get cooking! You won’t regret it!
Cottage Cheese Pancakes: A Delicious and Healthy Breakfast Option
These fluffy cottage cheese pancakes are a protein-packed twist on a breakfast classic. Perfect for a hearty morning meal or brunch, they can be served warm with maple syrup or fresh fruits for a delicious start to your day!
Ingredients
- 1 cup cottage cheese
- 3 large eggs
- 1 cup all-purpose flour
- 1 tablespoon sugar (optional)
- 1 teaspoon baking powder
- 1/2 teaspoon baking soda
- 1/4 teaspoon salt
- 1/2 teaspoon vanilla extract
- 2 tablespoons melted butter or oil (plus more for cooking)
- Maple syrup or fruit for serving (optional)
Instructions
- In einer großen Schüssel den Quark und die Eier vermengen. Mit einem Schneebesen oder einer Gabel gut vermischen, bis alles gut vermischt ist. Der Quark sollte größtenteils glatt sein, ein paar Klumpen sind jedoch für die Textur in Ordnung.
- Die geschmolzene Butter (oder Öl) und den Vanilleextrakt zur Mischung hinzufügen. Rühren, bis alles gut vermischt ist.
- In einer separaten Schüssel das Mehl, den Zucker (falls verwendet), das Backpulver, das Natron und das Salz vermengen. Dies hilft, die Treibmittel gleichmäßig zu verteilen und sorgt für fluffige Pfannkuchen.
- Die trockenen Zutaten nach und nach zu den feuchten Zutaten hinzufügen. Sanft umrühren, bis alles gerade so vermischt ist. Vorsicht, nicht zu viel rühren; ein paar Klumpen sind vollkommen in Ordnung. Der Teig sollte dick, aber gießbar sein.
- Eine beschichtete Pfanne oder Grillplatte bei mittlerer Hitze erhitzen. Eine kleine Menge Butter oder Öl hinzufügen, um die Oberfläche zu beschichten.
- Sobald die Pfanne heiß ist, etwa 1/4 Tasse Teig für jeden Pfannkuchen in die Pfanne gießen. Die Größe kann je nach Vorliebe angepasst werden.
- Die Pfannkuchen etwa 3-4 Minuten lang backen, oder bis Blasen auf der Oberfläche entstehen und die Ränder fest aussehen. Das zeigt an, dass es Zeit ist, sie zu wenden.
- Die Pfannkuchen vorsichtig mit einem Spatel umdrehen und auf der anderen Seite weitere 2-3 Minuten backen, bis sie goldbraun und durchgegart sind.
- Die fertigen Pfannkuchen auf einen Teller legen und im Ofen bei niedriger Temperatur (ca. 200°F oder 93°C) warm halten, während der restliche Teig gekocht wird.
- Sobald alle Pfannkuchen gekocht sind, sie auf einem Servierteller stapeln. Man kann sie mit einem Stück Butter zwischen jedem Pfannkuchen schichten, um zusätzlichen Geschmack zu erhalten.
- Die Pfannkuchen warm mit den gewünschten Toppings servieren. Ich liebe es, sie mit Ahornsirup zu beträufeln, aber frisches Obst, Joghurt oder eine Prise Puderzucker sind ebenfalls köstliche Ergänzungen.
- Wenn man kreativ werden möchte, kann man Toppings wie geschnittene Bananen, Beeren oder sogar einen Klecks Schlagsahne für eine besondere Leckerei hinzufügen.
- Wenn man Reste hat, die Pfannkuchen vollständig abkühlen lassen, bevor man sie in einem luftdichten Behälter im Kühlschrank aufbewahrt. Sie können bis zu 3 Tage aufbewahrt werden.
- Zum Aufwärmen einfach in einen Toaster oder die Mikrowelle legen, bis sie durchgewärmt sind. Man kann sie auch in einer Pfanne bei niedriger Hitze für ein paar Minuten auf jeder Seite aufwärmen.
- Für eine längere Aufbewahrung kann man die Pfannkuchen einfrieren. Zwischen jedem Pfannkuchen Backpapier legen, um ein Verkleben zu verhindern, und dann in einem gefrierfesten Beutel oder Behälter aufbewahren. Sie können bis zu 2 Monate eingefroren werden.
Notes
- For extra fluffiness, let the batter rest for about 10 minutes before cooking. This allows the flour to hydrate and the leavening agents to activate.
- Make sure your skillet is at the right temperature. If it’s too hot, the pancakes will burn on the outside while remaining raw on the inside. If it’s too cool, they won’t brown properly.
- Experiment with add-ins! You can mix in chocolate chips, nuts, or spices like cinnamon to customize your pancakes.
- For a healthier version, you can substitute half of the all-purpose flour with whole wheat flour or oat flour.


Leave a Comment