
Do you remember that sticky, pastel cloud of sugar that defined childhood excitement? We took that whimsical flavor and trapped it inside a golden, crunchy shell of pure bliss. Get ready for a dessert experience that defies physics and logic: making these incredibleCrispy Cotton Candy Cheesecake Bombs: A Sweet Treat Recipeis easier than explaining what cotton candy actually is.
- These delightful little bombs are surprisingly simple to assemble, requiring minimal baking skill but delivering maximum “wow” factor at any gathering.
- The flavor profile perfectly balances tangy cream cheese filling with the airy sweetness of spun sugar, creating an unforgettable bite of nostalgia.
- Visually stunning, the vibrant colors of the cotton candy wrapper peeking through the golden crust make this dessert instantly Instagram-worthy and fun.
- They are incredibly versatile, perfect for birthday parties, summer barbecues, or when you just desperately need a magical midnight snack (we won’t judge).
Ingredients for Crispy Cotton Candy Cheesecake Bombs: A Sweet Treat Recipe
Here’s what you’ll need to make this delicious dish:
- Cream CheeseUse full-fat brick cream cheese, ensuring it is softened completely at room temperature for a smooth, lump-free filling.
- Granulated SugarThis adds necessary sweetness to the cheesecake mixture, balancing the tanginess of the cream cheese base effectively.
- Alcohol-Free Vanilla ExtractEssential for depth of flavor; use pure alcohol-free vanilla extract for the best aromatic results in your filling.
- Lemon JuiceA small amount of fresh lemon juice brightens the cheesecake filling and helps cut through the richness of the dairy.
- Cotton CandySelect high-quality, brightly colored cotton candy; the vibrant colors and distinctive flavor are crucial for this recipe’s charm.
- Spring Roll WrappersThese thin, delicate wrappers provide the ideal crispy shell when quickly fried or baked, offering a neutral flavor base.
- Vegetable Oil or Canola OilUsed for achieving that perfect golden, bubbling crispness when frying the dessert bombs quickly and efficiently.
- Powdered SugarReserved for dusting the finished product, it adds a final elegant touch and extra layer of appealing sweetness.
The full ingredients list, including measurements, is provided in the recipe card directly below.
How to Make Crispy Cotton Candy Cheesecake Bombs: A Sweet Treat Recipe
Follow these simple steps to prepare this delicious dish:
-
Step 1: Preparing the Creamy Filling
In a medium bowl, beat the softened cream cheese with the granulated sugar, alcohol-free vanilla extract, and lemon juice until the mixture is light, fluffy, and completely smooth. Taste and adjust sweetness if desired, then chill this mixture for at least 30 minutes to make it easier to handle.
-
Step 2: Shaping the Cotton Candy Cores
Remove the cream cheese filling from the fridge. Scoop out small, uniform spoonfuls—about a tablespoon each—and roll them into smooth balls. Place a small, manageable tuft of cotton candy firmly around each cream cheese ball, ensuring the cheese is mostly encased. Work quickly, as cotton candy melts easily upon contact with moisture or warmth.
-
Step 3: Wrapping the Bombs
Carefully dampen a spring roll wrapper lightly with water; do not soak it, as it will tear. Place a cotton candy-encased cheesecake ball in the center. Fold the sides inward and then roll it tightly like a small envelope or egg roll. Press the edges firmly to seal the wrapper, ensuring no filling leaks out when cooking. Repeat this process until all the filling is wrapped.
-
Step 4: Achieving the Ultimate Crispy Texture
Heat about two inches of oil in a deep skillet or Dutch oven over medium-high heat until it reaches 350°F (175°C). Carefully lower the cheesecake bombs into the hot oil, working in batches to avoid crowding the pan. Fry them for just 1 to 2 minutes per side, or until they achieve a beautiful, uniform golden-brown crispness.
-
Step 5: Draining and Dusting
Remove the crispy bombs from the oil using a slotted spoon and immediately transfer them to a plate lined with paper towels to drain any excess oil. While they are still warm, lightly dust theCrispy Cotton Candy Cheesecake Bombs: A Sweet Treat Recipegenerously with powdered sugar for presentation and extra sweetness.
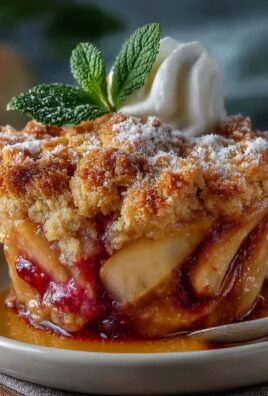
Transfer the warm, glittering bombs to a serving platter immediately, presenting them alongside a simple berry sauce for a touch of tartness.
The Day My Kitchen Became a Cotton Candy Explosion
Let me tell you, this recipe wasn’t born out of graceful culinary planning; it was born out of chaos and a momentary lapse in judgment involving a fairground prize. I had brought home a ludicrous amount of blue and pink spun sugar, thinking it would make a charming centerpiece. Naturally, humidity hit, and suddenly I was the overwhelmed owner of a sticky, collapsing cloud that looked suspiciously like a failed science experiment. I needed a rescue mission, and when in doubt, wrap things in pastry and deep-fry them.
The challenge was combining the ethereal lightness of cotton candy—a substance known for its inability to handle moisture—with the dense, tangy structure of cheesecake. Traditional methods failed spectacularly. The cotton candy melted into sugary puddles before it even touched the wrapper. After several failed attempts that left my kitchen looking like a pastel war zone, I realized the trick was freezing the cream cheese core first and then acting with the speed and precision of a culinary ninja. The resulting delicacy, which we affectionately call the Crispy Cotton Candy Cheesecake Bombs, managed to hold the whimsy of the fairground while offering the sophisticated crunch of a gourmet dessert.
Decoding the Cheesecake Bomb: Why These Ingredients Work Magic
Creating this textural masterpiece relies heavily on two components: the core filling and the wrapper choice. For the filling, we stick to classic, tangy cheesecake elements. Don’t skimp on the cream cheese quality; it provides the essential fat content that prevents the cotton candy from dissolving too rapidly when the warm oil finally hits it. The small addition of lemon juice might seem negligible, but it cuts through the intense sweetness of the spun sugar, ensuring these little bombs taste balanced, not just saccharine.
The true genius lies in the spring roll wrappers. Unlike thicker wonton wrappers, the spring roll variety is incredibly thin, allowing it to become shatteringly crisp in seconds without absorbing much oil. This rapid cooking time is vital. We are aiming for a beautiful, golden crust that protects the internal structure, allowing the cotton candy inside to slightly caramelize and melt into a gooey, sweet pocket around the still-cool cheesecake center. If you cook them too long, the whole thing turns into a sugary syrup mess. Precision timing is everything here, transforming a simple wrapper into the crunchy armor this dessert requires for success.
Mastering the Speed Factor: Tips for Quick Assembly
Working with cotton candy is less like cooking and more like a high-stakes race against time and humidity. If you live in a humid environment, you need to treat this process like an emergency deployment. Keep the cotton candy sealed until the absolute last moment. When you start wrapping, ensure your hands are cool and dry.
A crucial tip is to prepare the cheesecake balls and freeze them solid first. Once they are firm, remove only a few at a time for wrapping. This gives you precious seconds to press the cotton candy around the frozen ball without it immediately turning into sludge. When you choose your cotton candy, look for the fluffy, fresh kind. The denser, older varieties don’t offer the same textural resistance. Remember, the tighter the final spring roll wrap, the less chance you have of oil seeping in and ruining the surprise.
If you prefer a lighter, less caloric option, you can certainly bake these instead of frying them. Preheat your oven to 400°F (200°C). Lightly brush the wrapped bombs with melted unsalted butter or a quick spray of cooking oil, and bake them for approximately 10 to 12 minutes. While they won’t have the same dramatic, oil-bubbled crunch, they will still achieve a pleasant golden crispness that offers a delightful alternative texture for this sweet treat.
Creative Variations and Flavor Swaps
While the classic pink and blue cotton candy combination is pure visual joy, this structure is fantastically adaptable. Why stick strictly to standard vanilla cheesecake when you can experiment with flavor combinations? Imagine a lime cheesecake base paired with green apple-flavored spun sugar, or perhaps a raspberry cheesecake mixed with pink berry cotton candy. The possibilities are truly boundless once you understand the foundational mechanics of the crisp shell.
For an added layer of texture within the filling, consider folding in tiny, finely chopped white chocolate pieces or mini non-dairy chocolate chips into the chilled cream cheese mixture. This adds a slight melt and richness that contrasts beautifully with the airy cotton candy. Alternatively, skip the traditional cotton candy entirely and use colored hard candies that you’ve spun yourself using a machine—this usually yields a stronger, more concentrated flavor, often available in banana or grape varieties.
To really elevate the presentation of theseCrispy Cotton Candy Cheesecake Bombs: A Sweet Treat Recipe, consider pairing them with a dipping sauce. A simple homemade raspberry puree or a tart mango coulis offers a necessary acidic counterpoint to the intensely sweet filling. Avoid serving them with thick caramel or chocolate sauce, as these additions tend to overwhelm the delicate cotton candy flavor we worked so hard to preserve.
Storage and Reheating Advice for Optimal Crunch
Let’s address the inevitable question: Can I make these ahead of time? The answer is a conditional yes. You can assemble the cheesecake bombs (Steps 1 through 3) up to 24 hours in advance. Place the wrapped, uncooked bombs on a parchment-lined tray, ensuring they are not touching, and cover them loosely with plastic wrap. Store them in the refrigerator until you are ready to fry.
However, once fried, these delightful creations are best consumed immediately. The combination of the hot, wet filling (from the melted cotton candy) and the cooling oil means that the crispy exterior will start to soften within about an hour of preparation. If you find yourself with leftovers (a statistical anomaly, I’m sure), store them in an airtight container at room temperature for a day. Reheating is tricky; microwaving is a terrible idea as it turns the wrappers soggy and the cotton candy into magma. The only viable option is a quick flash in an air fryer or a toaster oven set to 350°F (175°C) for 3–5 minutes, aiming only to restore some of the outer crispness without fully melting the core.
This recipe is all about embracing fun, color, and that delightful childhood rush of pure sugar bliss. Dive in, embrace the sticky mess, and prepare to serve a dessert that guarantees smiles and highly impressed guests. Enjoy the magic!
The Accidental Discovery of Sunshine on a Plate

I was attempting a sophisticated gourmet appetizer when a bag of stray cotton candy tumbled onto my bowl of chilled cream cheese mixture. It seemed like a disaster, but the resulting sugary fluff blended into the tangy base, promising unexpected magic. That chaotic kitchen moment led directly to these delightful and funCrispy Cotton Candy Cheesecake Bombs: A Sweet Treat Recipe, truly sunshine encapsulated!
Perfecting the Cooking Process
For maximum efficiency, begin by preparing and chilling the cheesecake mixture first—this solidifies the texture, making it easier to roll. While the mixture sets, focus on crushing your crispy exterior ingredients. Finally, fry or bake the chilled bombs immediately before serving to ensure they achieve that perfect contrasting crunch against the creamy, sweet filling.
Add Your Touch
If you prefer a zingier flavor, swap out some of the alcohol-free vanilla extract for a teaspoon of lemon zest. You can exchange the crispy coating for finely crushed vanilla wafers or chocolate sandwich cookies. For a seasonal twist, incorporate a pinch of ground cardamom into the cheesecake mixture for a warming aroma that enhances this joyful sweet treat.
Storing & Reheating
Store the prepared, uncoated cheesecake mixture (before rolling) in an airtight container in the refrigerator for up to three days. Once the bombs are fully fried or baked, they are best enjoyed immediately. If absolutely necessary, reheat finished bombs quickly in an air fryer for 2 minutes to restore some of the exterior crispness.
My family swears the initial test batch, which admittedly looked a bit lopsided, tasted the best. They reminded me that sometimes, the most imperfect creations bring the most authentic smiles, especially when they involve cotton candy!
The Magic Behind Crispy Cotton Candy Cheesecake Bombs: A Sweet Treat Recipe
Let’s be honest, dessert should be an experience. It should make you feel like you’ve been whisked away to a carnival midway, surrounded by the scent of spun sugar and pure possibility. If you’ve ever found yourself staring into the refrigerator, craving something that is both rich and airy, something that delivers a delightful crunch followed by a melting softness, then you’ve stumbled upon the right place. We are diving headfirst into the wonderful world ofCrispy Cotton Candy Cheesecake Bombs: A Sweet Treat Recipe, a dessert so outrageously fun, it should probably come with a warning label.
I understand what you might be thinking: Cotton candy? In a cheesecake? Yes, and it’s spectacular. The secret lies in how the spun sugar dissolves and infuses the cream cheese mixture with a subtle, nostalgic sweetness and that characteristic airy texture. When paired with a golden-brown, crispy exterior, these little spheres become miniature flavor explosions. They look sophisticated enough for a dinner party, but they are whimsical enough for a movie night, striking that perfect balance between elegance and playful indulgence.
Building the Perfect Bomb: Ingredients You’ll Need
Creating these magical sweet treats requires simple, approachable ingredients. Focus on high-quality cream cheese and full-fat dairy to achieve the necessary structure and richness. The coating is where the “crispy” magic happens, providing that essential textural contrast. For this recipe, we are using a combination of finely crushed cereal flakes and graham cracker crumbs, giving us maximum crispiness without becoming too heavy.
- Cream Cheese Mixture:
- 16 oz full-fat cream cheese, softened
- 1/2 cup granulated sugar
- 1 teaspoon alcohol-free vanilla extract
- 1/4 cup heavy cream or dairy-free alternative
- 3/4 cup cotton candy (pink or blue, flavor of your choice)
- 1 tablespoon plant-based gelling agent (like pectin or agar-agar, mixed with 2 tablespoons water)
- Crispy Coating & Frying:
- 1 cup finely crushed cereal flakes (corn flakes or similar)
- 1/2 cup graham cracker crumbs
- 2 large eggs, beaten
- 1/4 cup all-purpose flour
- Vegetable oil or high-heat frying oil for deep frying or air frying
- Garnish (Optional):
- Powdered sugar
- Drizzle of melted white chocolate
The Science of Softness: Prepping the Filling
The foundation of any great cheesecake is a smooth, lump-free filling. Start by ensuring your cream cheese is genuinely soft, almost room temperature. This is non-negotiable for achieving a uniform blend. In a large bowl, beat the softened cream cheese until it is airy and fluffy. Add the sugar and vanilla, scraping down the sides of the bowl frequently. This process incorporates air, making the resulting bombs lighter.
Now for the star component: the cotton candy. Gently pull apart the cotton candy and fold it into the cream cheese mixture. It will immediately begin to melt and incorporate, turning the mixture a beautiful, pastel hue. Next, stir in the heavy cream and the prepared plant-based gelling agent mixture. The gelling agent is crucial here; since we aren’t baking these spheres in a crust, this ingredient helps the filling maintain its shape once chilled and during the rapid cooking process.
Chilling Out: Shaping and Firming
Once your mixture is perfectly blended, cover the bowl and refrigerate it for at least four hours, or preferably overnight. A firm, thoroughly chilled mixture is key to preventing frustration during the rolling process. Once firm, use a small ice cream scoop or tablespoon to portion the mixture. Quickly roll each portion into a smooth, 1.5-inch sphere. Place these delicate spheres onto a parchment-lined baking sheet.
Return the baking sheet with the cheesecake bombs to the freezer for a quick 30-minute freeze. This quick freeze creates a rock-solid exterior that resists melting when it hits the heat, ensuring the filling stays intact while the coating achieves maximum crunch. Don’t skip this freezing step; it is your insurance policy against cheesecake disasters!
The Triple Threat: Creating the Crispy Exterior
The secret to a truly crispy coating lies in the classic three-step breading process. Set up three shallow dishes. In the first dish, place the all-purpose flour. In the second, whisk the eggs until light and frothy. In the third, combine the crushed cereal flakes and graham cracker crumbs.
Working quickly, remove the cheesecake bombs from the freezer. Roll each frozen sphere first in the flour (shaking off any excess), then dip it into the beaten egg mixture, letting the excess drip away, and finally, roll generously in the crispy crumb mixture. Press the crumbs onto the surface firmly to ensure full coverage. For an extra secure coating, you may choose to repeat the egg and crumb steps, creating a double-breaded surface. Place the coated spheres back on the parchment-lined sheet.
Baking, Frying, or Air Frying: Choose Your Crunch
We are aiming for a beautiful golden-brown exterior and a soft, slightly warmed interior. You have several options for cooking theseCrispy Cotton Candy Cheesecake Bombs: A Sweet Treat Recipe:
Classic Deep Fry Method
Heat 2-3 inches of vegetable oil in a deep pot to 350°F (175°C). Carefully drop the bombs, working in small batches of 3 or 4, into the hot oil. Fry for 60 to 90 seconds, turning gently, until they achieve a deep golden color. Remove them quickly with a slotted spoon and place them on a paper towel-lined plate to drain excess oil. The cooking time is fast because the filling is already frozen; we only need to cook the coating.
The Air Fryer Approach
Preheat your air fryer to 375°F (190°C). Lightly spray the bombs with cooking spray. Arrange them in a single layer in the air fryer basket, ensuring they do not touch. Cook for 4 to 6 minutes, flipping halfway through, until they are beautifully golden and crunchy. This method produces excellent results with less oil, offering a slightly healthier sweet treat.
Baking Alternative
If you prefer to bake, preheat your oven to 400°F (200°C). Place the coated bombs on a lightly greased baking sheet. Bake for 8 to 10 minutes, or until the exterior is golden brown. Be aware that baking might not produce the same level of intense crispiness as frying or air frying, but it still yields a delicious result.
Tips for Bomb Success
-
Always use full-fat cream cheese and ensure it’s fully softened before mixing; this prevents graininess and ensures the cotton candy dissolves beautifully.
-
The initial 30-minute freeze is vital! This hard shell protects the delicate cheesecake mixture from melting immediately when exposed to the high cooking heat.
-
For the best crunch, make sure the crushed cereal flakes and graham crumbs are pulverized almost to a fine powder for maximum adhesion during the breading process.
Conclusion for Crispy Cotton Candy Cheesecake Bombs: A Sweet Treat Recipe
The journey to creating the perfectCrispy Cotton Candy Cheesecake Bombs: A Sweet Treat Recipeblends classic dessert techniques with a nostalgic, unexpected twist. We’ve managed to capture the airy sweetness of spun sugar within a rich, tangy cream cheese filling, all encased in a satisfyingly crunchy golden shell. Remember that preparation is key, especially the chilling and freezing steps, which guarantee perfectly formed spheres every time. Whether you choose to air fry or deep fry, these whimsical treats promise smiles and delightful surprise with every single bite. They are the ideal show-stopping dessert, effortlessly balancing fun and flavor.
They are undoubtedly a dessert that proves joy can indeed be perfectly bite-sized. Go forth and embrace the crispy, cotton-candy-infused happiness!
Print
Crispy Cotton Candy Cheesecake Bombs: A Sweet Treat Recipe
- Total Time: 35 minutes
- Yield: 4 servings
Description
These no-bake cheesecake bombs deliver a dreamy, carnival-inspired crunch! We mix rich cream cheese with pink and blue cotton candy for a meltingly sweet interior, then coat them in crispy graham…
Ingredients
- Cream Cheese: 8 ounces, softened
- Powdered Sugar: 1/2 cup
- Alcohol-Free Vanilla Extract: 1 teaspoon
- Pink and Blue Cotton Candy: 2 cups, loosely packed
- Graham Cracker Crumbs: 1 cup
- All-purpose Flour: 1/4 cup
- Large Egg: 1, lightly beaten
- Vegetable Oil: 3 cups (for frying)
Instructions
- Step 1: Prepare the Cheesecake Filling
- Step 2: Chill and Shape the Bombs
- Step 3: Set Up the Breading Station
- Step 4: Coat and Re-Freeze
- Step 5: Fry the Bombs
- Step 6: Serve
Notes
- Keep unfried cheesecake bombs frozen in an airtight container for up to 3 weeks, frying them straight from frozen for the best crispy coating and easiest handling.
- If you have leftovers, briefly reheat the fried bombs in a toaster oven or air fryer set to 350°F (175°C) for 3-5 minutes to restore the crispy shell without melting the center.
- Serve these vibrant bombs immediately after frying, dusted lightly with extra powdered sugar or alongside a sharp raspberry coulis to perfectly balance the extreme sweetness.
- The secret to a successful filling is working quickly when incorporating the cotton candy; fold it gently into the cream cheese mixture right before shaping to minimize premature dissolving.
- Prep Time: 15 minutes
- Cook Time: 20 minutes
- Method: Stovetop
- Cuisine: American
Nutrition
- Serving Size: 1 bomb (approx. 65g)
- Calories: 265
- Sodium: 150mg
- Fat: 18g
- Saturated Fat: 10g
- Trans Fat: 0g
- Protein: 20g


Leave a Comment