
Frozen Hot Chocolate Ice Cream: A Delightful Treat
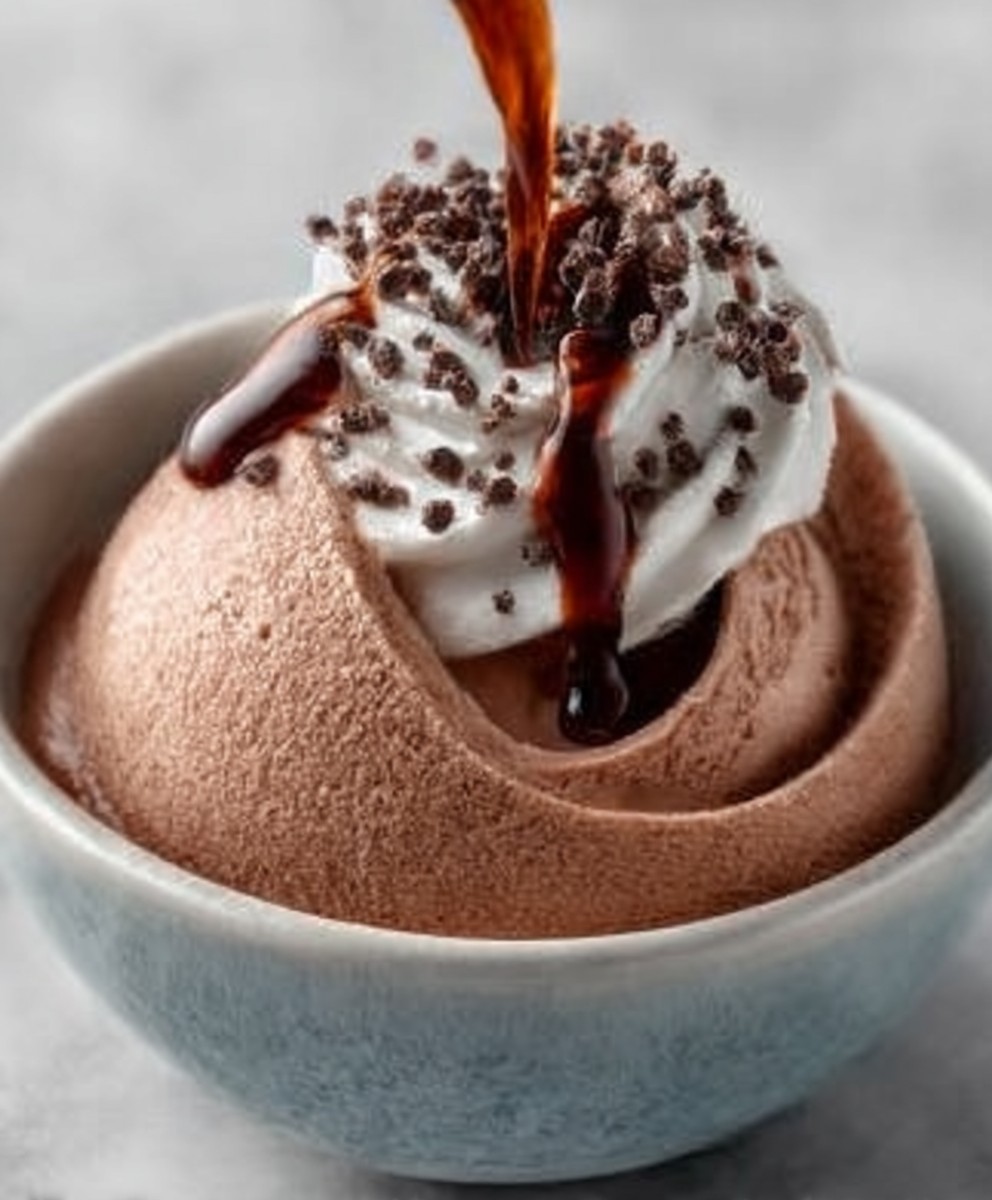
Frozen Hot Chocolate Ice Cream is a whimsical dessert that combines the rich, comforting flavors of hot chocolate with the creamy, refreshing texture of ice cream. This delightful treat is perfect for any occasion, whether you’re hosting a summer gathering or simply indulging in a cozy night in. The origins of this dessert can be traced back to the classic hot chocolate, a beloved beverage that has warmed hearts for centuries. Over time, creative chefs have transformed this traditional drink into a frozen delight that captures the essence of winter in every scoop.
People adore Frozen Hot Chocolate Ice Cream for its unique blend of flavors and textures. The smooth, velvety ice cream melts in your mouth, while the hints of chocolate and marshmallow create a nostalgic experience reminiscent of childhood. Not only is it delicious, but it’s also incredibly convenient to make, allowing you to whip up a batch in no time. Whether enjoyed on its own or topped with whipped cream and chocolate shavings, this dessert is sure to impress your family and friends. So, let’s dive into the recipe and discover how to create this irresistible Frozen Hot Chocolate Ice Cream at home!

Ingredients:
- 2 cups whole milk
- 1 cup heavy cream
- 1 cup granulated sugar
- 1/2 cup unsweetened cocoa powder
- 1 teaspoon vanilla extract
- 1/2 teaspoon salt
- 1/2 cup mini marshmallows (optional)
- 1/2 cup chocolate chips (optional)
- Whipped cream for serving
- Chocolate shavings or cocoa powder for garnish
Preparing the Base
- In a medium saucepan, combine the whole milk, heavy cream, and granulated sugar. Place the saucepan over medium heat.
- Whisk the mixture continuously until the sugar has completely dissolved. This should take about 3-5 minutes.
- Once the sugar is dissolved, add the unsweetened cocoa powder and salt. Whisk vigorously until the cocoa powder is fully incorporated and the mixture is smooth. This may take an additional 2-3 minutes.
- Remove the saucepan from the heat and stir in the vanilla extract. Allow the mixture to cool to room temperature. You can speed up this process by placing the saucepan in a bowl of ice water.
Chilling the Mixture
- Once the mixture has cooled, transfer it to a large mixing bowl or an airtight container.
- Cover the bowl or container with plastic wrap or a lid and place it in the refrigerator. Chill for at least 2 hours, or until the mixture is completely cold. This step is crucial for achieving a creamy texture in the final ice cream.
Churning the Ice Cream
- After the mixture has chilled, take it out of the refrigerator. If you have an ice cream maker, pour the chilled mixture into the machine according to the manufacturer’s instructions.
- Churn the mixture for about 20-25 minutes, or until it reaches a soft-serve consistency. If you don’t have an ice cream maker, you can use a large mixing bowl and a hand mixer. Beat the mixture on medium speed for about 5-7 minutes until it becomes fluffy and slightly thickened.
- If you’re adding mini marshmallows or chocolate chips, fold them into the mixture during the last few minutes of churning.
Freezing the Ice Cream
- Once the ice cream has reached the desired consistency, transfer it to a freezer-safe container. Use a spatula to smooth the top.
- Cover the container with a lid or plastic wrap, ensuring it is airtight to prevent ice crystals from forming.
- Place the container in the freezer and let it freeze for at least 4 hours, or until it is firm. For best results, I recommend letting it freeze overnight.
Serving the Frozen Hot Chocolate Ice Cream
- When you’re ready to serve, remove the ice cream from the freezer and let it sit at room temperature for about 5-10 minutes. This will make it easier to scoop.
- Using an ice cream scoop, serve the frozen hot chocolate ice cream into bowls or cones.
- Top each serving with a generous dollop of whipped cream. You can also sprinkle chocolate shavings or a dusting of cocoa powder on top for an extra touch.
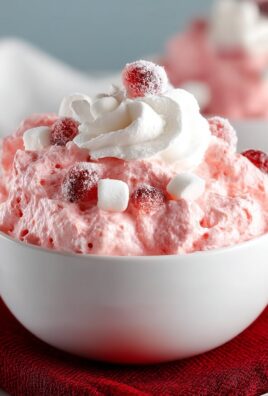
- If desired, add additional mini marshmallows or chocolate chips on top for a fun and festive presentation.
Storing Leftover Ice Cream
- If you have any leftover ice cream, make sure to store it in an airtight container in the freezer. It can last for up to 2 weeks, but I doubt it will last that long!
- To maintain the best texture, try to minimize the number of times you open the container, as this can introduce air and cause ice crystals to form.
Tips for Perfect Frozen Hot Chocolate Ice Cream
- For a richer chocolate flavor, consider using dark cocoa powder instead of unsweetened cocoa powder.
- If you want to add a hint of spice, a pinch
Conclusion:
If you’re looking for a delightful treat that combines the rich, comforting flavors of hot chocolate with the creamy, refreshing texture of ice cream, then this Frozen Hot Chocolate Ice Cream recipe is an absolute must-try! It’s the perfect dessert for any occasion, whether you’re hosting a summer barbecue, celebrating a birthday, or simply indulging in a cozy night in. The combination of chocolate, cream, and a hint of vanilla creates a luscious dessert that will leave your taste buds dancing with joy.
One of the best things about this recipe is its versatility. You can easily customize it to suit your preferences or to impress your guests. For a fun twist, consider adding a swirl of peanut butter or caramel sauce to the mixture before freezing. You could also mix in some crushed cookies or candy bars for added texture and flavor. If you’re feeling adventurous, try incorporating different types of chocolate, such as dark chocolate or white chocolate, to create a unique flavor profile. And don’t forget about toppings! Whipped cream, chocolate shavings, or even mini marshmallows can elevate your Frozen Hot Chocolate Ice Cream to a whole new level.
When it comes to serving suggestions, this dessert pairs beautifully with a warm slice of chocolate cake or a rich brownie. You could also serve it alongside fresh berries for a refreshing contrast. For a fun presentation, consider serving it in a waffle cone or a chocolate-dipped bowl. The possibilities are endless, and I encourage you to get creative with your serving ideas!
I truly believe that once you try this Frozen Hot Chocolate Ice Cream, it will become a staple in your dessert repertoire. It’s not just a treat; it’s an experience that brings joy and comfort with every spoonful. I invite you to gather your ingredients, roll up your sleeves, and dive into this delicious recipe. Don’t forget to share your experience with friends and family, and let them know how much you enjoyed making and indulging in this delightful dessert.
Whether you’re enjoying it on a hot summer day or as a sweet ending to a winter meal, this Frozen Hot Chocolate Ice Cream is sure to impress. So go ahead, give it a try, and let the magic of chocolate and ice cream bring a smile to your face! I can’t wait to hear how it turns out for you!
Frozen Hot Chocolate Ice Cream: A Decadent Treat for Chocolate Lovers
Enjoy a refreshing twist on a classic favorite with this Frozen Hot Chocolate Ice Cream. This creamy, chocolatey treat combines the rich flavors of hot chocolate with the coolness of ice cream, making it the perfect dessert for warm days or cozy nights. Topped with whipped cream and optional marshmallows or chocolate chips, it's sure to satisfy any chocolate lover's cravings!
Ingredients
- 2 cups whole milk
- 1 cup heavy cream
- 1 cup granulated sugar
- 1/2 cup unsweetened cocoa powder
- 1 teaspoon vanilla extract
- 1/2 teaspoon salt
- 1/2 cup mini marshmallows (optional)
- 1/2 cup chocolate chips (optional)
- Whipped cream for serving
- Chocolate shavings or cocoa powder for garnish
Instructions
- In a medium saucepan, combine the whole milk, heavy cream, and granulated sugar. Place the saucepan over medium heat.
- Whisk the mixture continuously until the sugar has completely dissolved, about 3-5 minutes.
- Add the unsweetened cocoa powder and salt, whisking vigorously until fully incorporated and smooth, about 2-3 minutes.
- Remove from heat and stir in the vanilla extract. Allow to cool to room temperature, or speed up the process by placing the saucepan in a bowl of ice water.
- Transfer the cooled mixture to a large mixing bowl or airtight container.
- Cover with plastic wrap or a lid and refrigerate for at least 2 hours, or until completely cold.
- Pour the chilled mixture into an ice cream maker and churn according to the manufacturer’s instructions for about 20-25 minutes until soft-serve consistency. If using a hand mixer, beat on medium speed for 5-7 minutes until fluffy and slightly thickened.
- If desired, fold in mini marshmallows or chocolate chips during the last few minutes of churning.
- Transfer the ice cream to a freezer-safe container and smooth the top with a spatula.
- Cover tightly with a lid or plastic wrap to prevent ice crystals from forming.
- Freeze for at least 4 hours, or overnight for best results.
- Let the ice cream sit at room temperature for 5-10 minutes before scooping.
- Serve in bowls or cones, topped with whipped cream, chocolate shavings, or cocoa powder. Add extra mini marshmallows or chocolate chips if desired.
- Store any leftover ice cream in an airtight container in the freezer for up to 2 weeks.
- Minimize opening the container to maintain texture and prevent ice crystals.
Notes
- For a richer chocolate flavor, consider using dark cocoa powder.
- A pinch of cinnamon or cayenne pepper can add a delightful hint of spice.


Leave a Comment