
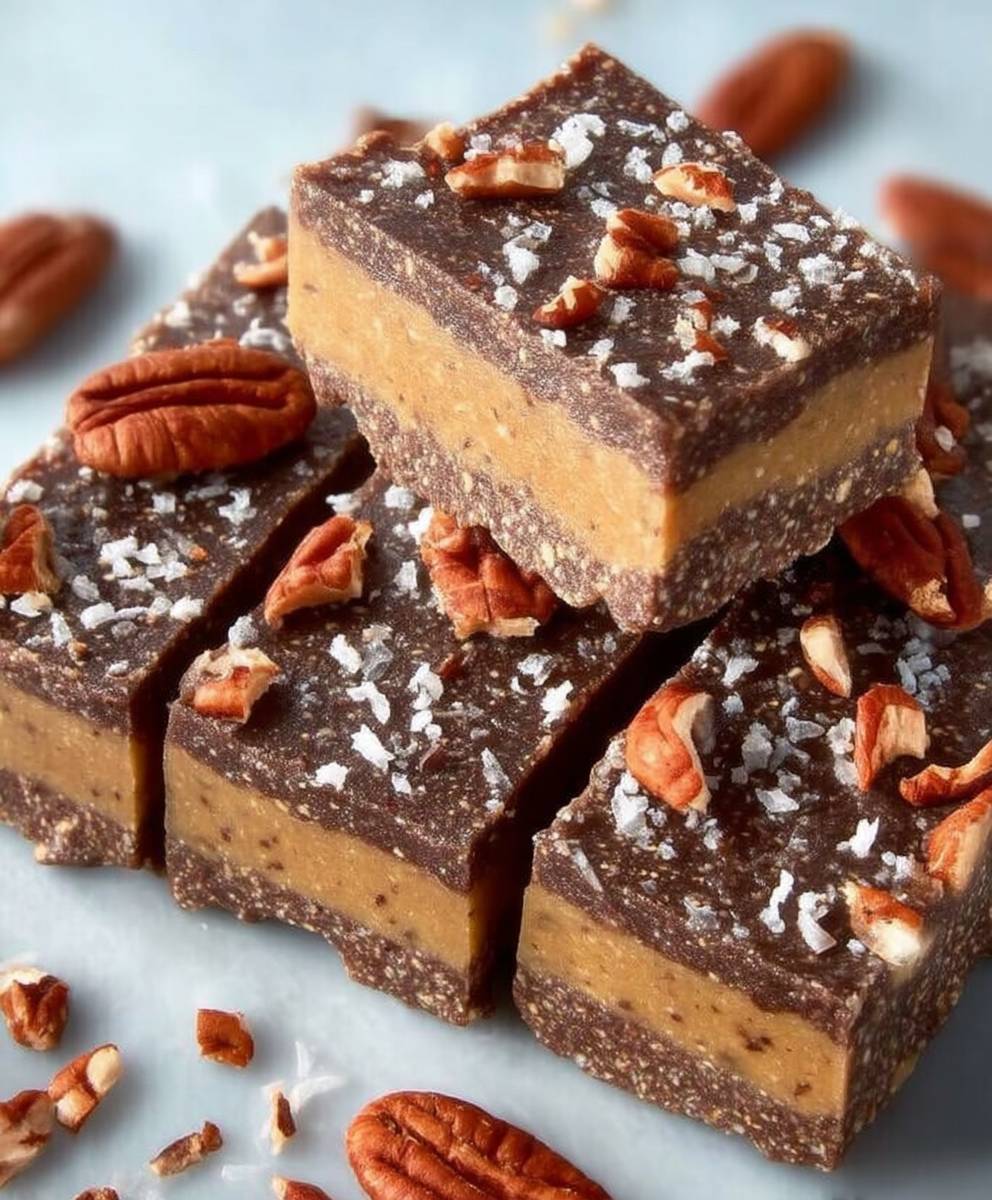
Healthy No Bake Cookie Dough Bars
Healthy No Bake Cookie Dough Bars are a delightful treat that combines the indulgence of cookie dough with the benefits of wholesome ingredients. Imagine biting into a rich, creamy bar that tastes just like your favorite cookie dough, but without the guilt! These bars are not only easy to make, but they also require no baking, making them a perfect option for those hot summer days when you want something sweet without turning on the oven.
The concept of cookie dough has been around for centuries, often associated with childhood memories of sneaking spoonfuls while baking cookies with family. Today, the love for cookie dough has evolved, leading to the creation of healthier versions that everyone can enjoy. People adore these Healthy No Bake Cookie Dough Bars for their delicious taste and satisfying texture, which perfectly balances creaminess and chewiness. Plus, they are incredibly convenient—ideal for a quick snack or a nutritious dessert that you can whip up in no time!
So, if you’re looking for a delicious way to satisfy your sweet tooth while keeping things healthy, these Healthy No Bake Cookie Dough Bars are just what you need!

Ingredients:
- 1 cup almond flour
- 1/2 cup rolled oats
- 1/4 cup maple syrup
- 1/4 cup natural peanut butter or almond butter
- 1/4 cup coconut oil, melted
- 1 teaspoon vanilla extract
- 1/2 teaspoon sea salt
- 1/2 cup dark chocolate chips or cacao nibs
- 1/4 cup chopped nuts (optional, for added crunch)
Preparing the Dough
- Gather all your ingredients: Before you start, make sure you have everything you need on hand. This will make the process smoother and more enjoyable.
- Mix the dry ingredients: In a large mixing bowl, combine the almond flour and rolled oats. Stir them together until they are well mixed. This will be the base of your cookie dough bars.
- Add the wet ingredients: In a separate bowl, mix together the maple syrup, peanut butter (or almond butter), melted coconut oil, and vanilla extract. Whisk these ingredients until they are smooth and well combined.
- Combine wet and dry ingredients: Pour the wet mixture into the bowl with the dry ingredients. Use a spatula or wooden spoon to mix everything together until a thick dough forms. It may take a bit of elbow grease, but keep mixing until there are no dry spots left.
- Incorporate the chocolate chips: Gently fold in the dark chocolate chips (or cacao nibs) and chopped nuts if you’re using them. Make sure they are evenly distributed throughout the dough.
Setting the Bars
- Prepare your pan: Line an 8×8 inch baking dish with parchment paper, leaving some overhang on the sides. This will make it easier to lift the bars out once they are set.
- Transfer the dough: Spoon the cookie dough mixture into the prepared baking dish. Use a spatula to spread it out evenly, pressing it down firmly to ensure it holds together.
- Chill the bars: Place the baking dish in the refrigerator for at least 1-2 hours. This will help the bars firm up and make them easier to cut.
Cutting and Serving
- Remove from the fridge: Once the bars have chilled and set, take them out of the refrigerator. Use the parchment paper overhang to lift the entire block of cookie dough out of the dish.
- Cut into bars: Place the block on a cutting board. Using a sharp knife, cut it into squares or rectangles, depending on your preferred size. I usually aim for about 16 bars, but you can make them larger or smaller as you like.
- Store the bars: Place the cut bars in an airtight container. They can be stored in the refrigerator for up to a week or in the freezer for longer storage. If you freeze them, just make sure to separate layers with parchment paper to prevent sticking.
Enjoying Your No Bake Cookie Dough Bars
- Serve chilled: These bars are best enjoyed chilled. They make a perfect snack or dessert, and you can even pack them for on-the-go treats.
- Customize your bars: Feel free to experiment with different mix-ins! You can add dried fruits, seeds, or even a sprinkle of cinnamon for a different flavor profile.
- Share with friends: These bars are a hit at gatherings! Share them with friends and family, and watch them disappear in no time.
Tips for Success
- Use fresh ingredients: Make sure your nut butter and coconut oil are fresh for the best flavor.
- Adjust sweetness: If you prefer a sweeter bar, feel free to add a bit more maple syrup or a sweetener of your choice.
- Experiment with flavors: Try
Conclusion:
If you’re looking for a delicious and guilt-free treat, these Healthy No Bake Cookie Dough Bars are an absolute must-try! Not only are they incredibly easy to make, but they also satisfy your sweet tooth without compromising your health goals. With wholesome ingredients like oats, nut butter, and a touch of maple syrup, you can indulge in a dessert that’s both nutritious and satisfying. Plus, the best part is that there’s no baking involved, making it a perfect recipe for those hot summer days when you want to avoid turning on the oven.
When it comes to serving suggestions, these bars are incredibly versatile. You can enjoy them as a quick breakfast on the go, a post-workout snack, or even a delightful dessert after dinner. For an extra touch, consider drizzling some melted dark chocolate on top or sprinkling a few sea salt flakes to enhance the flavor. If you’re feeling adventurous, you can also mix in some add-ins like chopped nuts, dried fruits, or even a handful of chocolate chips to customize the bars to your liking. The possibilities are endless, and that’s what makes this recipe so exciting!
I encourage you to give these Healthy No Bake Cookie Dough Bars a try. They’re not only a hit with adults but also a fantastic way to get kids involved in the kitchen. Imagine the joy on their faces as they help mix the ingredients and press the mixture into the pan! Once you’ve made them, I’d love to hear about your experience. Did you stick to the original recipe, or did you add your own twist? Sharing your thoughts and variations can inspire others to try this delightful treat as well.
So, gather your ingredients, roll up your sleeves, and get ready to whip up a batch of these scrumptious bars. Trust me, once you take that first bite, you’ll be hooked! Don’t forget to snap a picture and share it on social media, tagging your friends and family to spread the joy of these Healthy No Bake Cookie Dough Bars. Happy baking (or should I say, mixing)!
Healthy No Bake Cookie Dough Bars: A Delicious Guilt-Free Treat
These No-Bake Cookie Dough Bars are a healthy and delicious treat made with almond flour, oats, and natural sweeteners. Easy to prepare and customizable with your favorite mix-ins, they make for a perfect snack or dessert that can be enjoyed chilled.
Ingredients
- 1 cup almond flour
- 1/2 cup rolled oats
- 1/4 cup maple syrup
- 1/4 cup natural peanut butter or almond butter
- 1/4 cup coconut oil, melted
- 1 teaspoon vanilla extract
- 1/2 teaspoon sea salt
- 1/2 cup dark chocolate chips or cacao nibs
- 1/4 cup chopped nuts (optional, for added crunch)
Instructions
- Gather all your ingredients.
- Mix the dry ingredients: In a large mixing bowl, combine the almond flour and rolled oats.
- Add the wet ingredients: In a separate bowl, mix together the maple syrup, peanut butter (or almond butter), melted coconut oil, and vanilla extract.
- Combine wet and dry ingredients: Pour the wet mixture into the bowl with the dry ingredients and mix until a thick dough forms.
- Incorporate the chocolate chips: Gently fold in the dark chocolate chips (or cacao nibs) and chopped nuts if using.
- Prepare your pan: Line an 8×8 inch baking dish with parchment paper.
- Transfer the dough: Spoon the cookie dough mixture into the prepared baking dish and spread it out evenly.
- Chill the bars: Place the baking dish in the refrigerator for at least 1-2 hours.
- Remove from the fridge: Lift the entire block of cookie dough out of the dish using the parchment paper overhang.
- Cut into bars: Place the block on a cutting board and cut it into squares or rectangles.
- Store the bars: Place the cut bars in an airtight container.
- Serve chilled: Enjoy the bars chilled as a snack or dessert.
- Customize your bars: Experiment with different mix-ins.
- Share with friends: Share the bars with friends and family.
Notes
- Use fresh ingredients: Make sure your nut butter and coconut oil are fresh for the best flavor.
- Adjust sweetness: If you prefer a sweeter bar, feel free to add a bit more maple syrup or a sweetener of your choice.
- Experiment with flavors: Try adding different mix-ins to create your own unique bars.

Leave a Comment